Clone your Photo!
Science may have figured out how to clone the sheep, but WE can clone anything in Photoshop!
Here are a couple quick tricks to copy an object in your photo and put it anywhere in your photo!
Option 1: Using Clone Stamp:
Clone stamp will copy the object and allow you to put it anywhere else in the photo. It is a quick option, but you cannot adjust the size of the object you stamp.
-Use the Clone stamp tool to clone the entire object you wish to copy by pressing Alt+mouse click.
-Stamp it anywhere you wish to see it in the photo.
-use the healing tool to help soften weird spots that may have occurred in the stamping process.
Reminders:
-you can adjust the size of the clone stamp tool with the bracket keys.
-just like the brush, you can change the type of stamp (soft edge or hard, opacity, etc...) up on the top tool bar.
Option 2: Creating a Copy Layer
Creating a copy layer will allow you to copy the image and adjust its size. It has more steps than the clone stamp.
-Choose a selection tool that you learned about on the last assignment (click here for more info). Select the entire object you wish to copy. I would suggest the quick selection tool for organic shapes.
-Hit Ctrl+J (or you can right click and choose Layer viaCopy). This creates a new layer with that object on it. You will see the layer appear on the layer tool bar on the right
**Important** Each time that you hit Ctrl+J you will make a new layer with the object.
This is important for 2 reasons:
1. You can hit Ctrl+J right away to create as many copies as you wish of the object you are copying. You will not see anything happening yet in the photo, but you will see the layers appear on the right. Each layer has a new copy.
2.You will need to be on the layer you wish to move. You can tell which layer you are on because there will be white brackets around the layer image on the right layer tool bar.
-Choose a layer with the object. Use the mover tool to move the object anywhere in the photo. The mover tool is the arrow tool on the top of the left tool bar. Just click and drag on the object and the copy will appear.
-If you wish to adjust the size of the object, you can drag it in from the corner of the box around the object in the photo. (if the box is not there, you can go up to the top bar and click "show transform controls or just click Ctrl+T)
**Important- you cannot move on to other details once you have changed the size of an object until you double click! Double clicking finalizes the size change. So if it seems like you suddenly cannot do anything, double click.
-Go to another layer and repeat! Do this for all layers.
Tip! Can't tell which layer is which?! Click the eyeball next to the layer and it will hide that layer. (or if you look at the little picture in the layer, it shows you where the object is in the photo)
Once Complete, Flatten your layers (Layer tab, choose flatten image). Save as a Jpeg
Assignment:
Copy an object at least 3 times in your photo.
Put your original and the edited photo onto your page
Title the Assignment Clone your Photo (or something about copying an object)
Publish and Post to Canvas
Cloning my Photo!
Original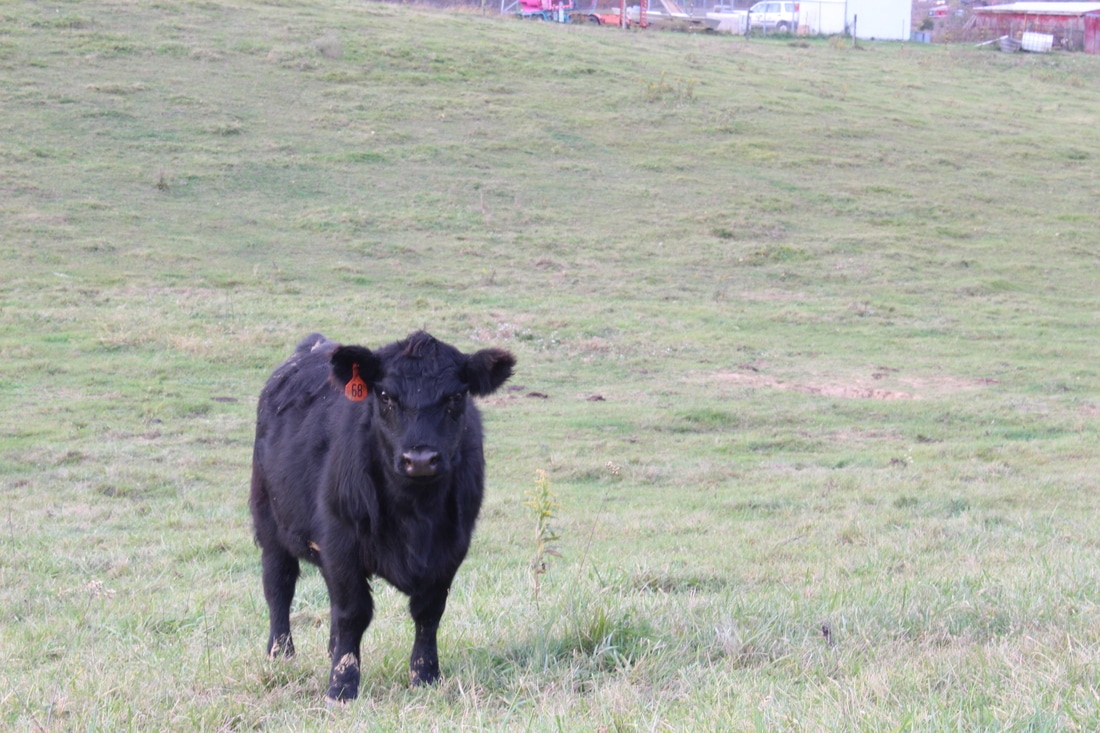
|
Edited using Layer Copy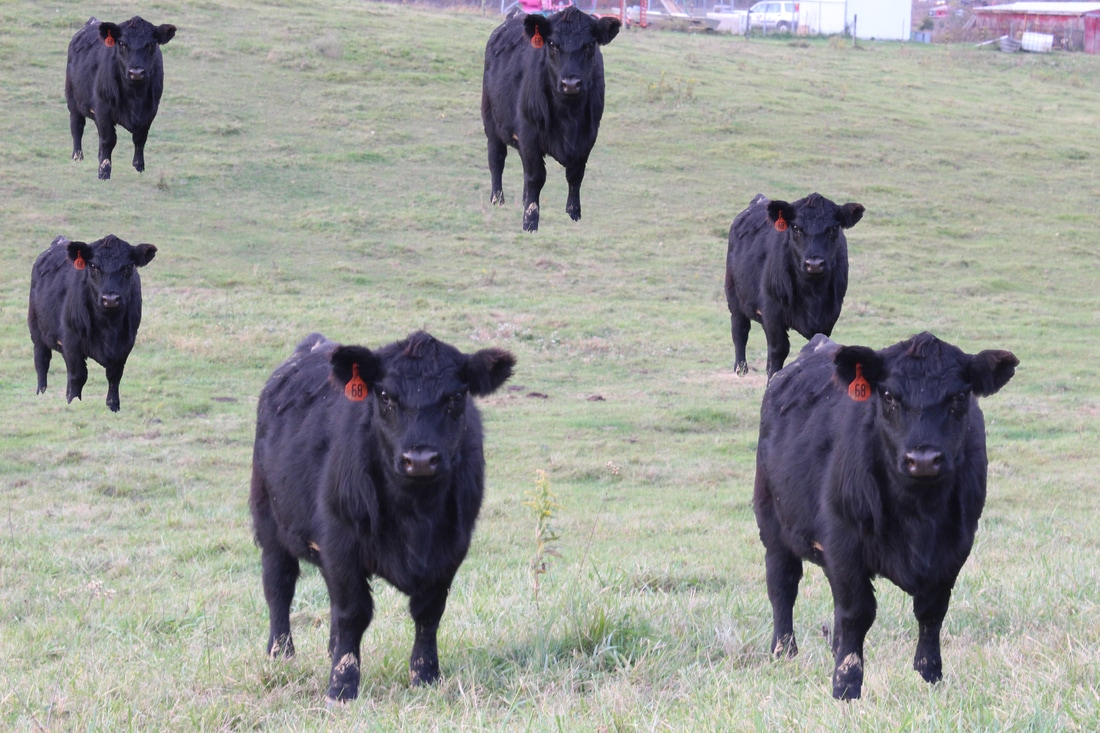
|
