Crazy Close Up's- Color in Water and Bubbles!
We are going to attempt to get a sharp clear image of color flowing through water and bubbles.
Photo taking only today! Do NOT post to your webpage at this time!!
**If you could not get onto Canvas yesterday to post your URL for previous assignments...don't forget to get on and do that at some point today (maybe when uploading photos at the end).
What to do?...
Work with 2/3 people per camera, and set yourself around a station with bubbles or water. If there is no space available, then you can take a small container of bubbles and go into the spare room to take photos of bubbles- please don't go crazy with the bubbles you are blowing! Less is more:)
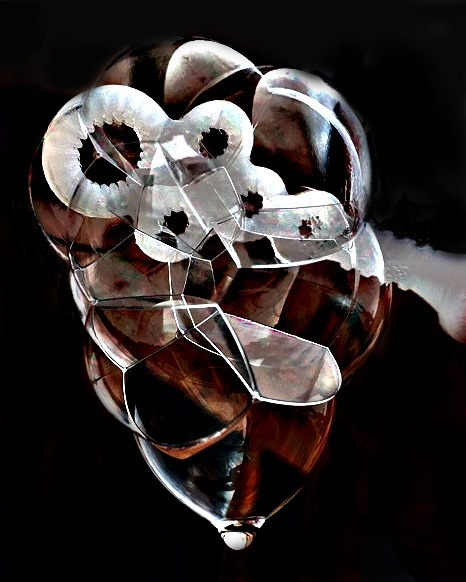
When working with bubbles:
*When photographing moving bubbles- Constantly keep your hand on the focus ring and adjust as you move.
Use a low aperture for close up's of bubbles.
Have one person blowing bubbles for the group.
Work together...bubbles are fun, but you are just wasting time and bubbles if you aren't coordinating with the photographer!
When dropping color:
Work as a team- have one person drop the color while the other photographs (use your phone if you are without a manual)
Coordinate when you drop the color- one drop at a time or the color gets too dark!
Dump water and start again when one photo shoot is finished.
You can try changing your aperture to adjust how you are seeing the color flow through the water. I would say working from your lowest Fstop in the camera (maybe F4 or 5) to maybe F8 is the range you'd want to try.
Low F# will have selective focus on a portion of the color (the rest of the color will appear slightly out of focus...giving depth to the photo)
Higher F# will give clarity to the entire color flowing through the water- make sure you have plenty of exterior light and are not underexposed!
Adjust the ISO if needed or your shutter, but try not to put the shutter too low (it will blur the color flowing through the water).
TIPS:
*Try not to go over 800 ISO at any point. Ideally not over 400 ISO. The higher ISO range can be grainy. Go lower on your aperture or add more exterior lighting to the room.
*Great exterior light source- your Phone! Use the flashlight on your phone to add lighting...just stay out of the photo!
*When I say faster shutter...I don't mean super fast. Anything above 1/250 is typically used to help adjust for lighting in a highly lit area (like outside midday). My photos of the water below was 1/125 and 1/150-that is actually decently fast.
*Check your photos constantly to check for proper lighting exposure- if you are over or underexposed, adjust your settings (or add more lighting from the lamps), and retake your photos. ASK FOR HELP IF YOUR NOT SURE!!
*You have to work together- One person blowing bubbles or dropping color into the water while another person takes the photos. If you have a third person, they can help adjust lighting or take photos with their phone (if there is space available).
*Might want to take the camera back to the computers mid way through taking photos to check what you have and how they look...then go back for a round 2 of taking photos adjusting your way of taking the photos to improve them or get a different view.
*Try different angles (above, below, from the side, from underneath). Be aware of your background. Simple images like this work so much better with a simple background!
Requirements:
No set # of photos at this time...take a lot and keep taking them!
Good Photos- in focus, good lighting, interesting composition
Photos of all 3 stations- color in water, bubbles in tubs, and moving bubbles.


|

|
