Shutter Speed...Movement in a Photo
We have looked at how the aperture allows up to change the depth of field (length of focus) in our photos. NOW we will see how the shutter speed allows you to capture movement! Remember, each setting in Manual allows you to adjust your camera's exposure to light. When we change any of those settings, the others will need to be adjusted as well!
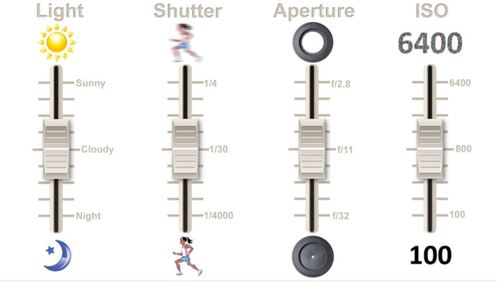
For Example: When you look at the dials below, imagine them controlling your exposure... If you slow down your shutter speed, it would increase the lighting. You would then need to make your aperture size smaller (which is a larger number...weird sounding, but it is because it is a fraction!) or make your ISO lower/less sensitive.
So what does shutter do???
Well, so far we have used shutter speed as our last setting...a way to adjust our exposure level to fit our aperture and ISO settings. Now we will start with our as our priority!
Shutter Speed allows you to capture movement in a photograph. While the shutter is open, it will capture ANY movement that is happening. So you can have the ability to freeze a moment in time by using a fast shutter speed. Or you can see the movement of an object by have a slower shutter.
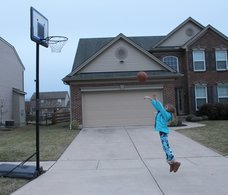
Look at the examples below.
Notice how as the shutter speed gets faster, less movement is captured. Also, notice how the ISO and aperture need to adjust to allow for the change in shutter speed.
Most action is frozen!
|
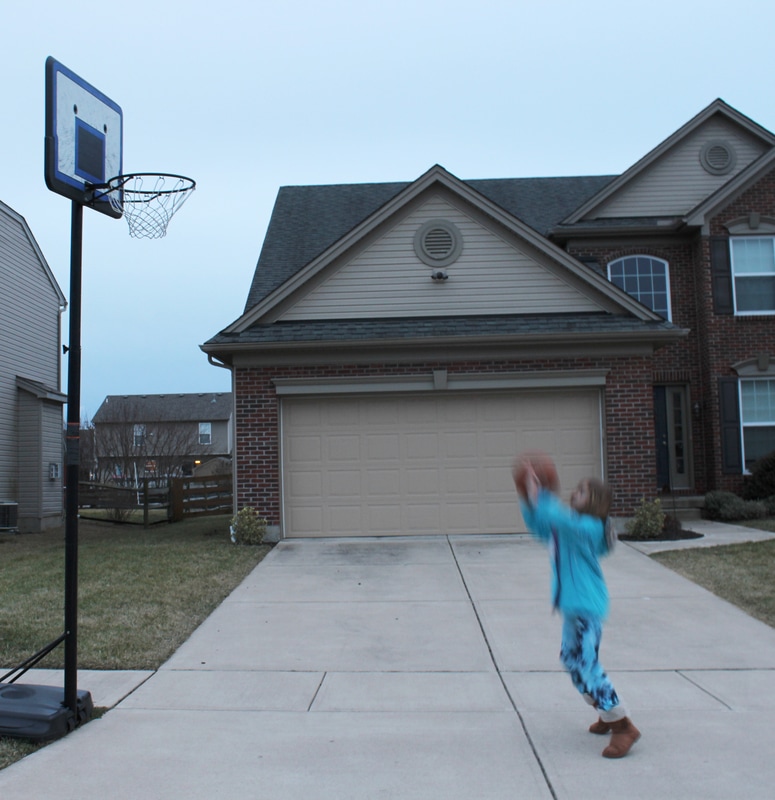
Some blur present
|
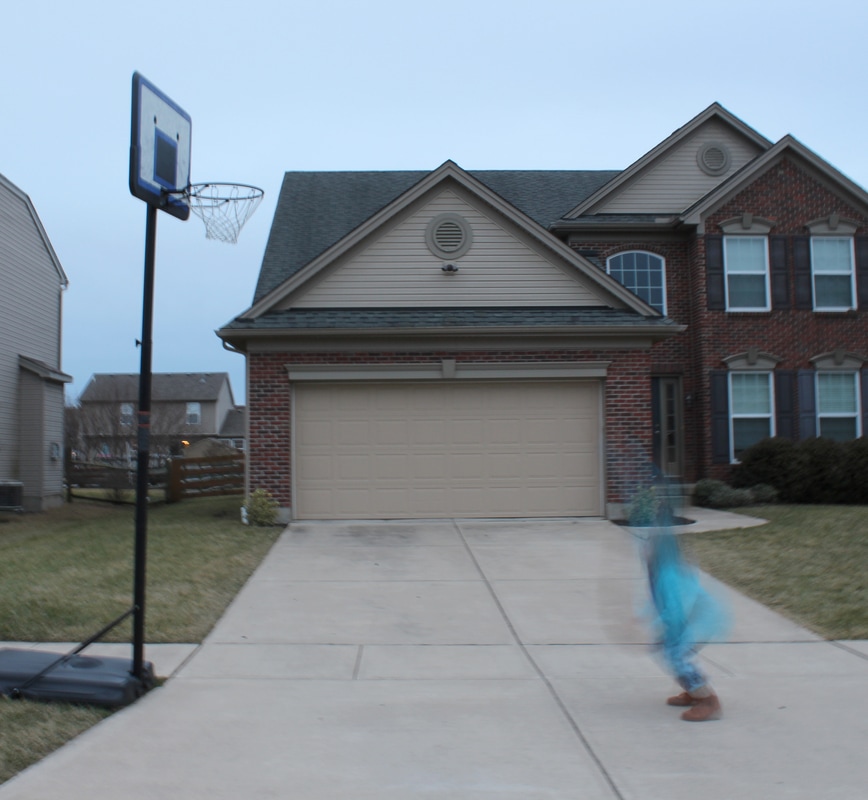
Getting blurry!
|
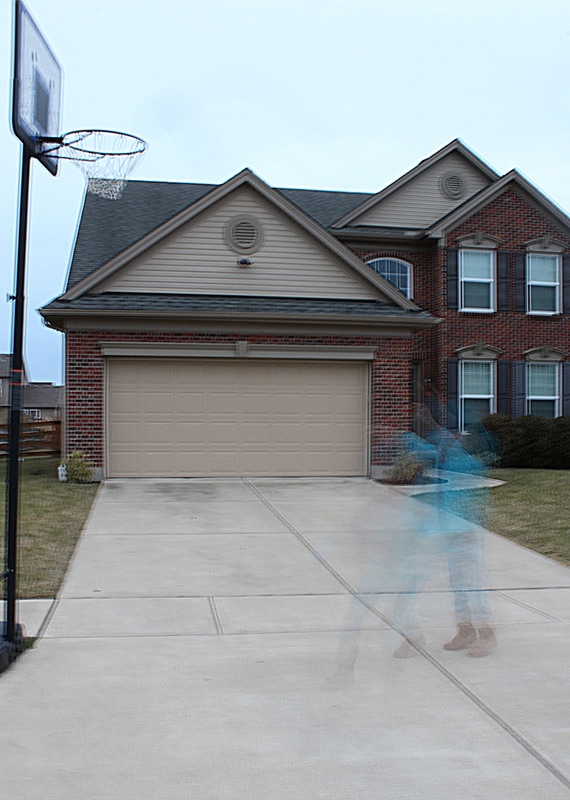
She looks like she's moving at super speed!
|